In this tutorial, we will explore how we can use a Servo Motor with Arduino using Arduino IDE. Also, we will see with an example code how we can rotate the servo motor. So, let’s get started.
You may also like reading:
What is a Servo Motor
Servos are motors designed for precise control of movement, typically moving to a specific position rather than continuously rotating. They are easy to connect and manage due to their integrated motor drivers.
Inside, a small DC motor connects to the output shaft through gears, which then drives a servo horn. This output shaft is also connected to a potentiometer. Typically, servo arms can rotate up to 180 degrees. With an Arduino, you can instruct a servo to move to a designated position, and it will do so precisely. It’s that straightforward!
The potentiometer gives position feedback to the error amplifier in the control unit, comparing the motor’s current position with the target position.
The control unit responds to any discrepancy by adjusting the motor’s position to match the desired target.
How a Servo Works
A servo motor can be controlled by sending a series of pulses of square wave similar to PWM.. For a 50Hz signal, a pulse is sent after every 20 milliseconds. Pulse length determines the position of the servo.
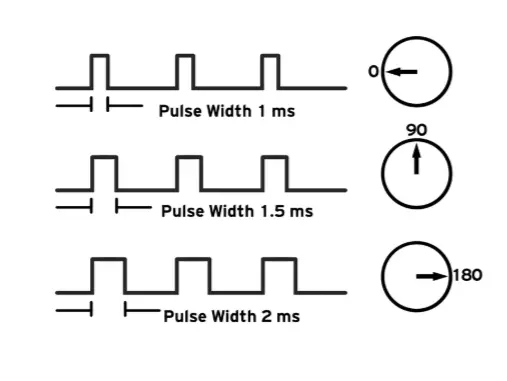
- For 0 degree rotation the pulse will be of 1 ms or less (Minimum Pulse)
- For 90 degree rotation the pulse will be of 1.5 ms ( Middle position )
- For 180 degree rotation the pulse will be of 2 ms (Maximum Pulse)
Note that, using the servo library automatically disables PWM functionality on PWM pins 9 and 10 on the Arduino.
SG90 Servo motor and its features
Here SG90 servo motor is used. It is a very popular servo motor.
It Operates on 4.8-6VDC and can rotate 180 degrees( 90 in each direction).
It draws about 10mA when idle and 100mA to 250mA when moving. So, it can be powered with Arduino’s 5V output.
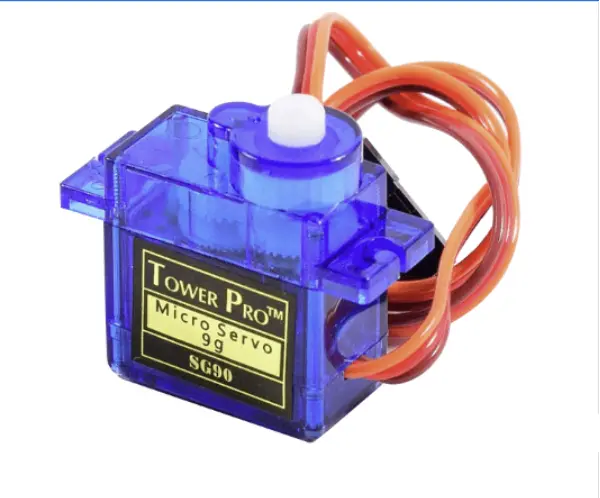
Servo Motor Pinout
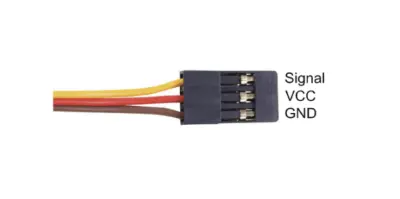
| GND | It is the common ground for the motor and the logic. |
| VCC (5V) | It is the positive voltage that powers the servo |
| Signal | It is the input from the control system. |
Interfacing Servo Motor with Arduino
In this section of the tutorial, we will interface the SG90 Servo Motor with Arduino Uno using Arduino IDE.
Components List
| Components Name | Quantity | Purchase Link |
|---|---|---|
| Arduino Uno | 1 | Amazon | AliExpress |
| Servo Motor | 1 | Amazon | AliExpress |
| Jumper Wires Pack | 1 | Amazon | AliExpress |
| BreadBoard | 1 | Amazon | AliExpress |
Affiliate Disclosure: When you click on links to make a purchase, this can result in this website earning a commission.
Connection
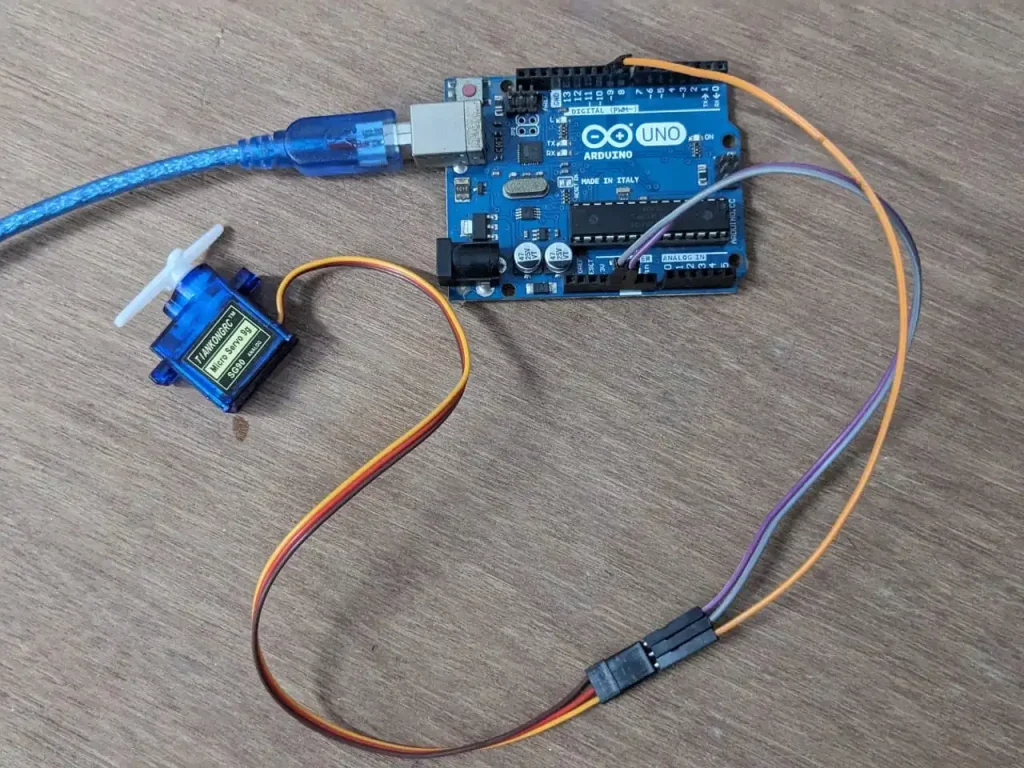
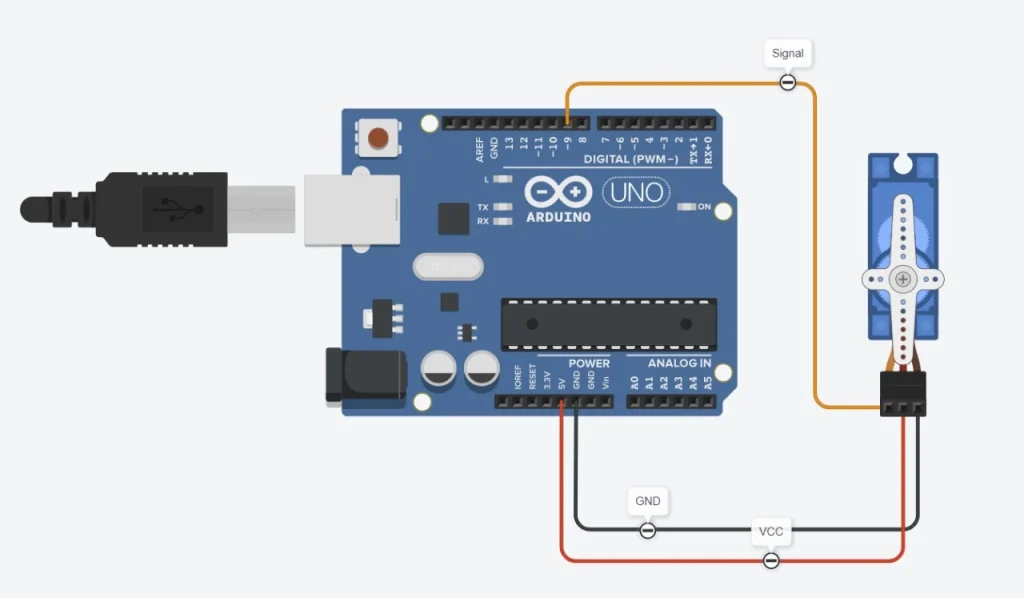
Connect the servo motor with Arduino using the connection and the following schematic or circuit diagram.
| SG90 Servo | Arduino |
| GND | GND |
| VCC | 5V |
| Signal | 9 |
Circuit diagram
Arduino Code
Step 1:
Open your Arduino IDE and create a new sketch. Write this example code given below.
#include <Servo.h>

Servo s1;

void setup() {

 s1.attach(9);
}

void loop() {

s1.write(0);
delay(1000);
s1.write(180);
delay(1000);
s1.write(0);
}
Step 2:
Compile your code and select the right Arduino board and port. Then upload your code by pressing the upload button of Arduino IDE.
Step 3:
After uploading the Servo should turn 180 Degrees and after turning it should be back again at its initial spot and do the same thing again with a 1-second delay.
