
You can program the Raspberry Pi Pico and Pico W using various programming languages, including MicroPython, C/C++, and CircuitPython. The good news is that you can program your Raspberry Pi Pico with the Arduino IDE. If you are familiar with the Arduino IDE, then it is easy for you. But if you are not familiar with the Arduino IDE, then this tutorial will help you. In this tutorial, I will show you how you can program your Raspberry Pi Pico or Pico W with the Arduino IDE. Later, I will show you an LED blink example.
Our other Raspberry Pi Pico related tutorials are:
- Raspberry Pi Pico ADC tutorial using Arduino IDE with Example Code
- How to interface Raspberry Pi Pico with RS485 Protocol
What you need to Program Raspberry Pi Pico using Arduino IDE
- A Raspberry Pi Pico or Pico W. You can buy Raspberry Pi Pico or Pico W from Amazon.
- Arduino IDE in your PC or Laptop.
- A Micro USB B connector.
Installing Arduino IDE
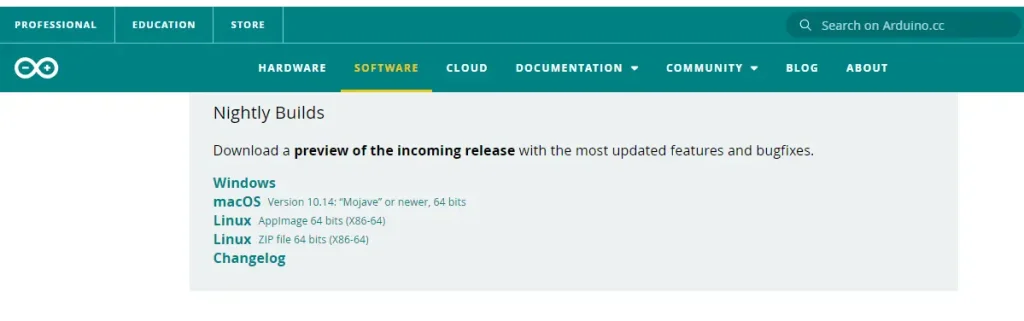
You can download and install latest version of Arduino IDE from www.arduino.cc Go to SOFTWARE and download your Windows or Mac or Linux version and Install to your computer.
Prepare Arduino IDE for Raspberry Pi Pico or Pico W
Step One:
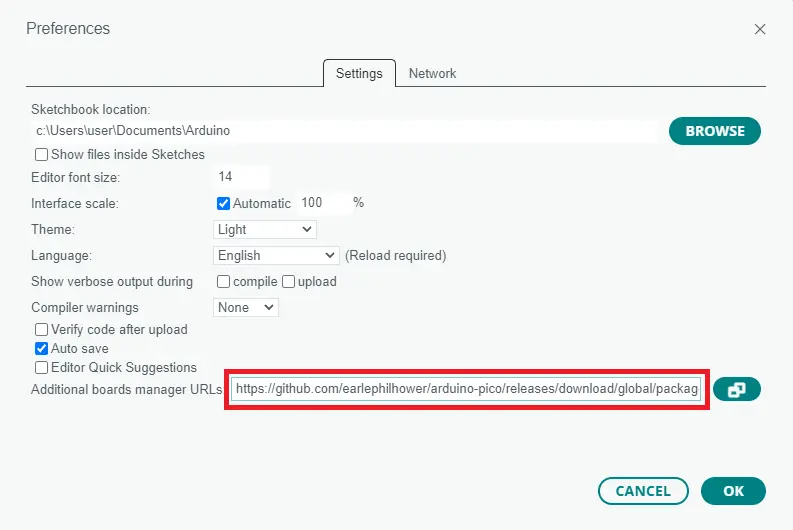
Open Arduino IDE and go to File>>Preferences then copy and paste the following URL in Additional board managers URLs
https://github.com/earlephilhower/arduino-pico/releases/download/global/package_rp2040_index.json
If you have more than one URLs then simply place a comma (,) after the existing URL and paste the Pico URL. Just like this one:
https://github.com/earlephilhower/arduino pico/releases/download/global/package_rp2040_index.json,https://raw.githubusercontent.com/espressif/arduino-esp32/gh-pages/package_esp32_index.json
Step Two:
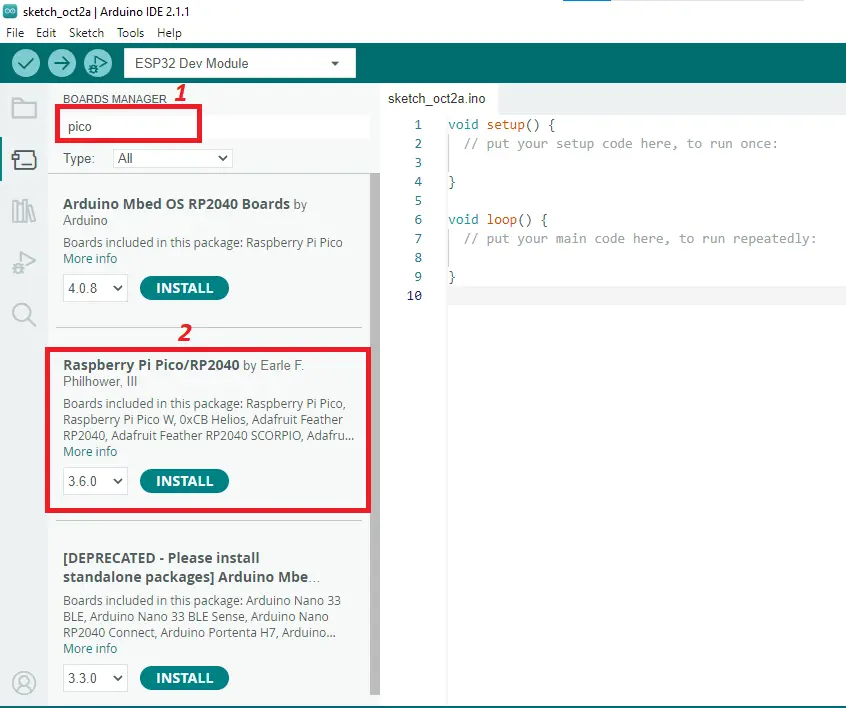
Go to Tools>>Board>>Board Manager and search for Pico and install Raspberry Pi Pico/RP2040.
Uploading a Sketch to Raspberry Pi Pico using Arduino IDE
This time we will upload a simple LED blinking sketch to Raspberry Pi Pico using Arduino IDE. We need some components for our project:
| Component Name | Quantity | Purchase Link |
|---|---|---|
| Raspberry Pi Pico or Pico W | 1 | Amazon | Amazon |
| LED | 1 | Amazon |
| 220ohm resistor | 1 | Amazon |
| Jumper wire pack | 1 | Amazon |
| Breadboard | 1 | Amazon |
| Micro USB Cable | 1 | Amazon |
Affiliate Disclosure: When you click on links to make a purchase, this can result in this website earning a commission. Affiliate programs and affiliations include, but are not limited to Amazon.com
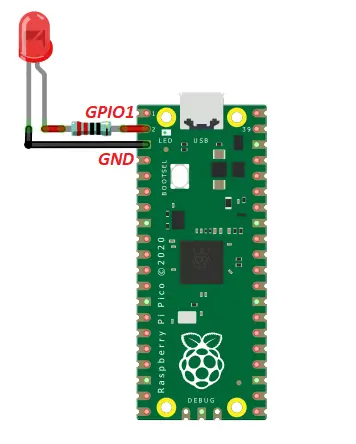
Connect the anode leg of the LED to GPIO1 (pin number 1) with a 220ohm resistor and the cathode leg of the LED to Ground (GND). You can also connect LED to any GPIO of the Pico. To know more about Raspberry Pi Pico GPIOs click this link.
Circuit Diagram
Follow the Steps to Upload a Sketch
Step One:
Go to File>>New Sketch. Clear the existing code.
Step Two:
Copy and paste this code to Arduino IDE
#define LED 1     // define GPIO1 or pin number 1 as LED

void setup() {
  // initialize GPIO1 pin LED as an output.
  pinMode(LED, OUTPUT);
}

// the loop function runs over and over again forever
void loop() {
  digitalWrite(LED, HIGH);  // turn the LED on (HIGH is the voltage level)
  delay(1000);                      // wait for a second
  digitalWrite(LED, LOW);   // turn the LED off by making the voltage LOW
  delay(1000);                      // wait for a second
}
Save this as a Sketch on your computer.
Step Three:
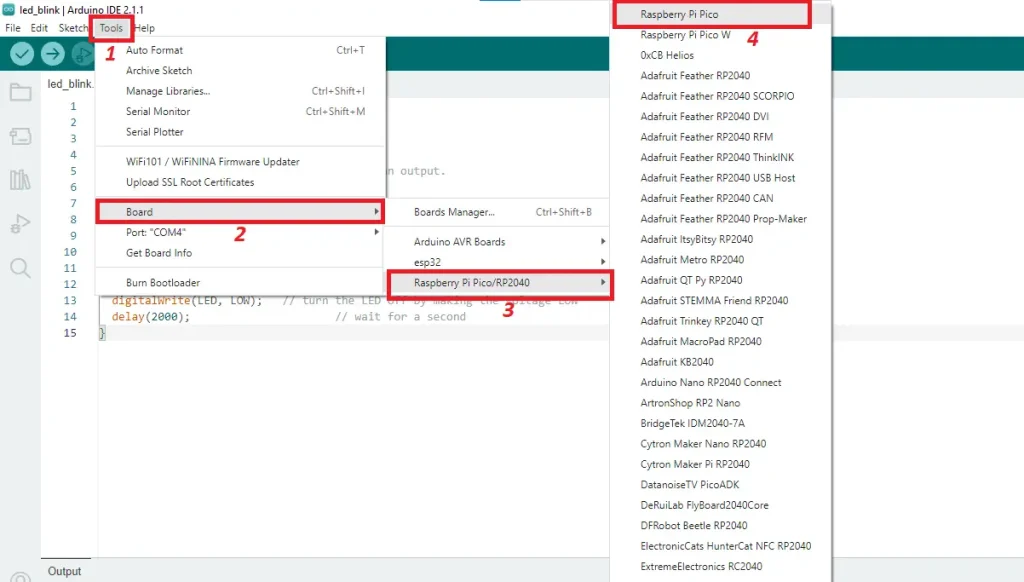
Go to Tools>>Board>> Raspberry Pi Pico/RP2040 and select Raspberry Pi Pico (you can also select Pico W from this list).
Step Four:
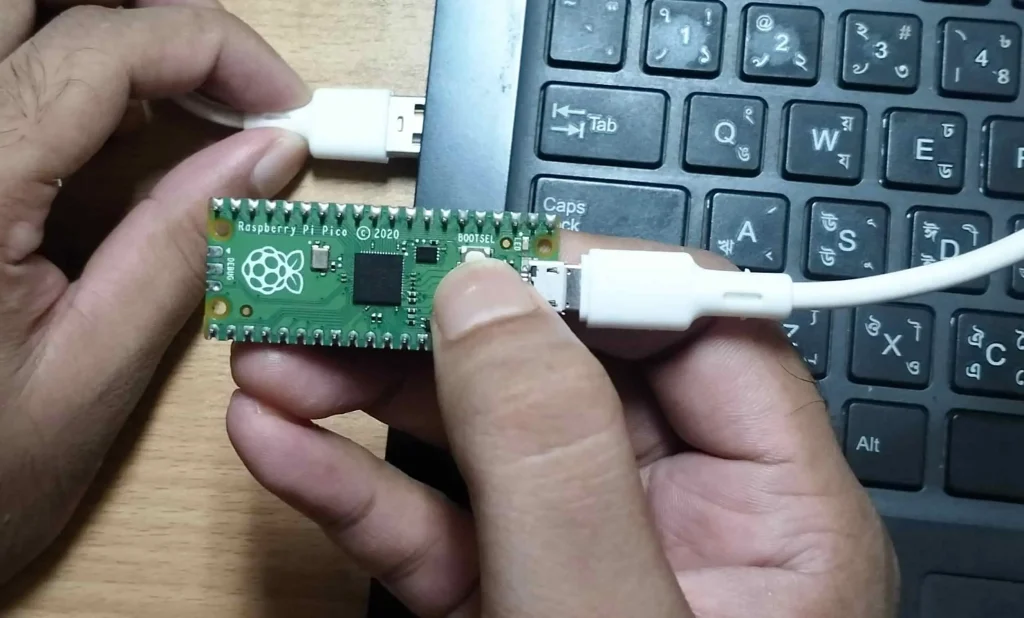
Now connect the micro-USB cable to your Pico, then press and hold the BOOTSEL button of your Pico. Plug in a USB cable and hold the button at the same time. Now the Raspberry Pi Pico is in bootloader mode.
During the second upload, you do not need to take the Pico in bootloader mode. You just plug the USB into your computer.
Step Five:
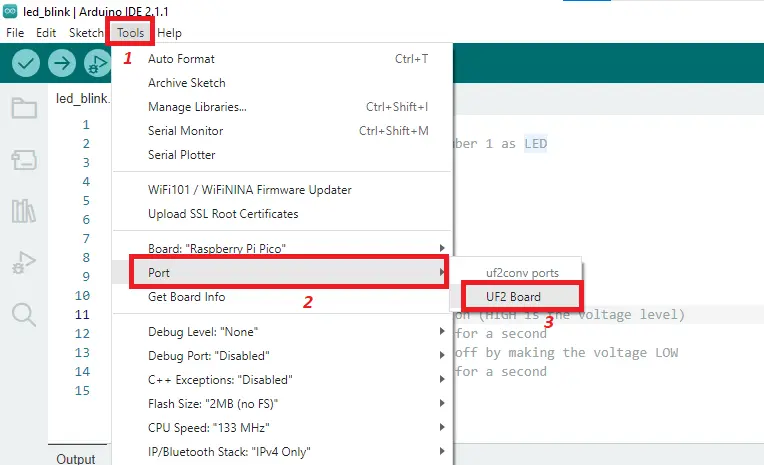
Go to Tools>>Port and select the right port where your Raspberry Pi Pico or Pico W is connected. In my case the port name was UF2.
After a successful connection with the Pico, you will see this message

Step Six:
Hit the upload button to upload your sketch.

Step Seven:
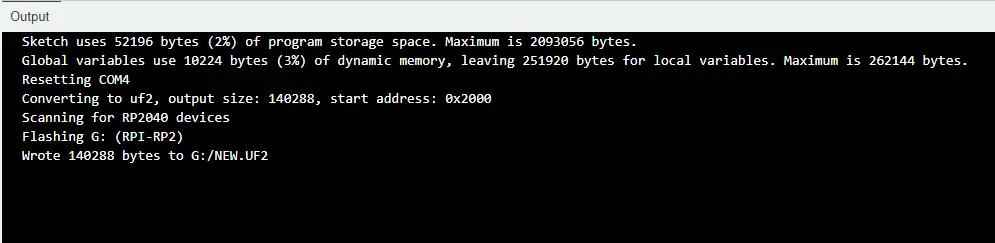
After finishing uploading, you will see these messages on Arduino IDE.
And you are done. You will find that the LED turns ON and OFF every second.
Video Tutorial
Conclusion
If you are new to Raspberry Pi Pico, then this article will help you create Raspberry Pi Pico and Pico W projects with the Arduino IDE. So, why wait? Grab your Raspberry Pi Pico, fire up Arduino IDE, and start bringing your creative electronics projects to life!