
Arduino IDE is one of the most popular IDE to upload a sketch into an Arduino board. Using Arduino IDE we can also upload code into our ESP32 board. In this tutorial, we will explain step by step how to install Esp32 board in Arduino ide for Windows, MAC OS or Linux operating system. We also create an example project which is blinking a led ON or OFF every one second.
Our other ESP32-related tutorials are:
- ESP32 LoRaWAN Gateway tutorial with Sensor Node
- Esp32 LoRa tutorial using Arduino IDE with example code
- How to interface ESP32 with RS485 (Modbus) sensors with example code
For troubleshooting, some extremely useful test equipment
[wptb id=890]
Affiliate Disclosure: When you click on links to make a purchase, this can result in this website earning a commission. Affiliate programs and affiliations include, but are not limited to Amazon.com
Installing Arduino IDE
First you need to download the Arduino IDE from Arduino website. Link is given below:
Please note : you can use the older version of Arduino IDE, if you want. Just go through the link and scroll down. You will find the older Arduino IDE versions. We are using Arduino ide 1.8.13 in this tutorial for demonstrate the whole process.
Installing ESP32 Board in Arduino IDE
Step 1: Connect your ESP32 with your PC.
Step 2: In Arduino IDE, go to File>>Preferences>>Additional board manager URLS and copy the link and save it.
https://raw.githubusercontent.com/espressif/arduino-esp32/gh-pages/package_esp32_index.json 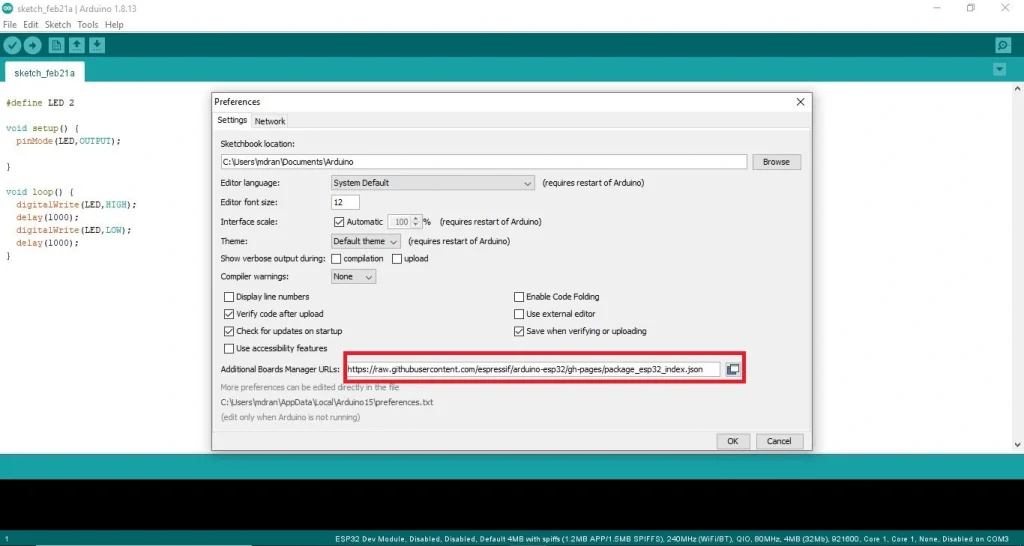
Please Note: If you also have ESP8266 board then copy the below link and paste it. separate the two URLs with a comma. Example is given below:
https://raw.githubusercontent.com/espressif/arduino-esp32/gh-pages/package_esp32_index.json, http://arduino.esp8266.com/stable/package_esp8266com_index.jsonStep 03: Go to Tools>>Board>>Boards Manager and search for ESP32 toolchain by Espressif Systems and install it.
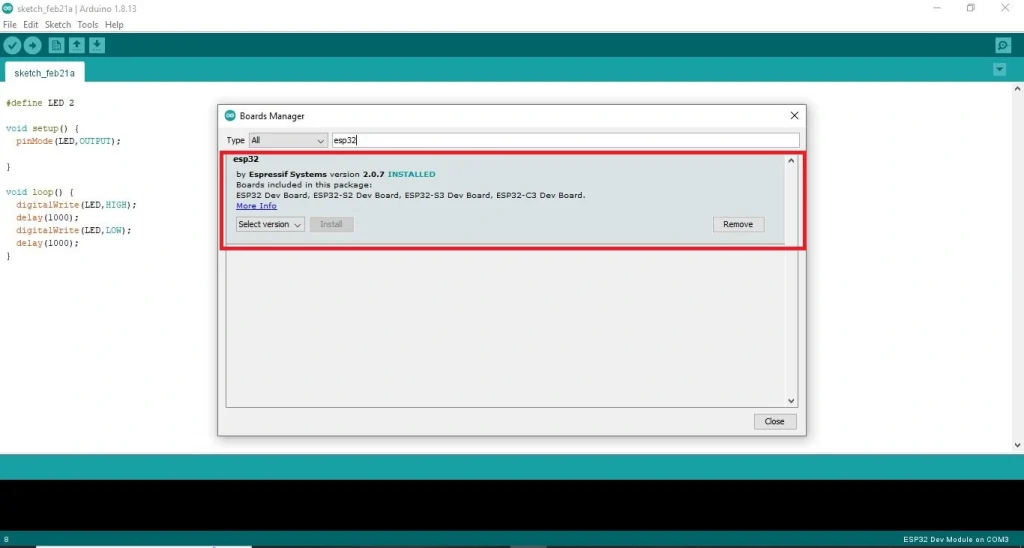
This is how you can install your ESP32 Development Board to your Arduino IDE.
ESP32 Arduino IDE led blinking project
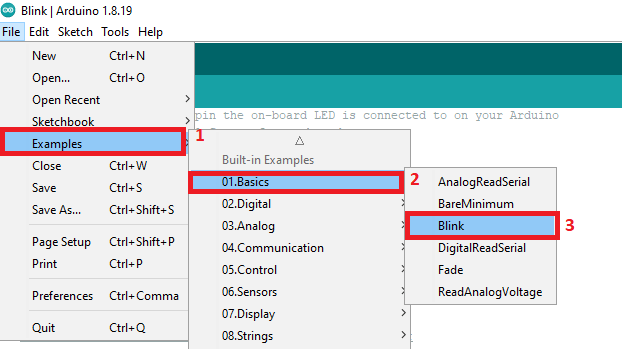
In this section of the tutorial, We will create a example project that is blinking a led every one second. For this click to File >> Examples >> Basics >> Blink
Now, go to Tools >> Port and select your Port which your ESP32 is connected. For us it was COM8.
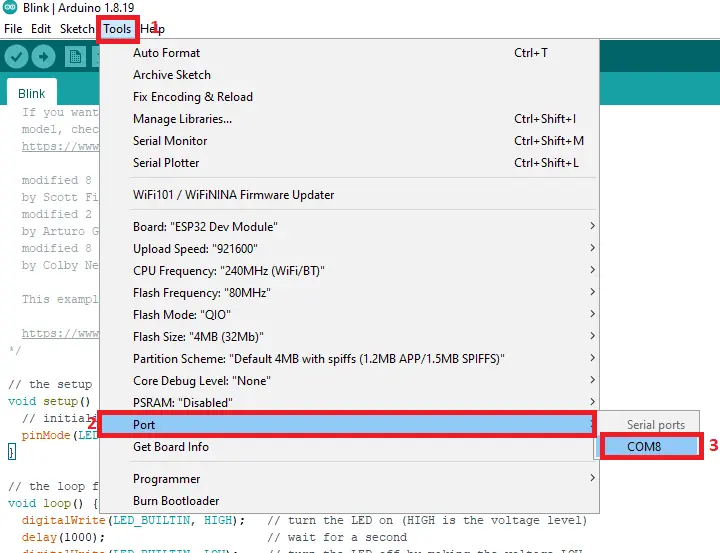
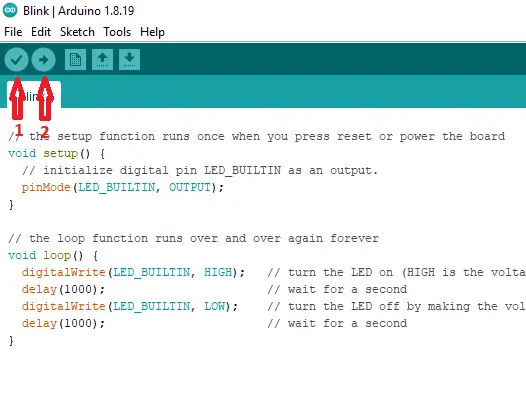
And the final step Verify and Upload the code.
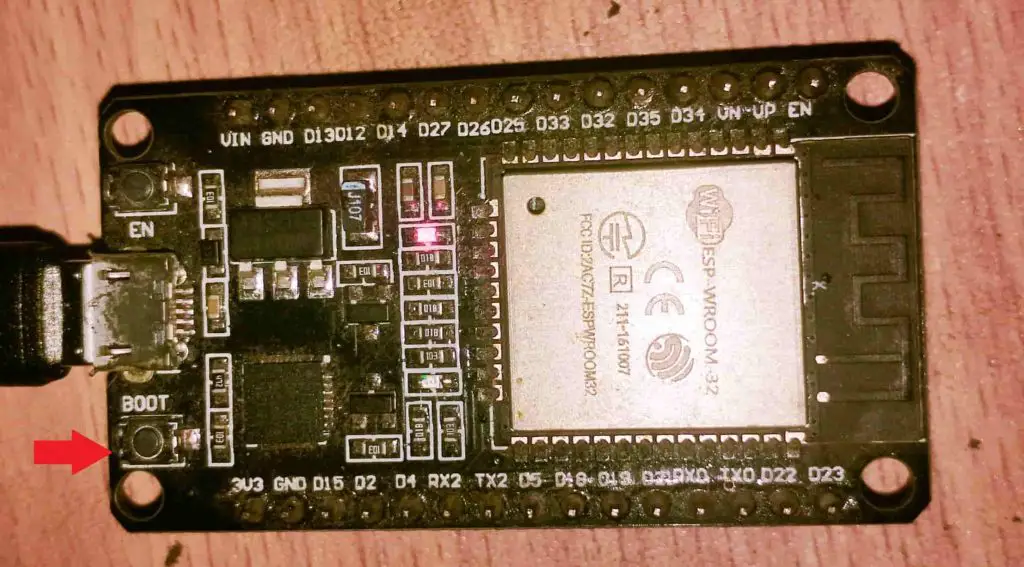
Please Note: you need to press the Boot button immediately on your ESP32 development board and hold it for some seconds for completing the upload process.
Full code
#define LED_BUILTIN 5 // we define GPIO 5 as LED Pin

// the setup function runs once when you press reset or power the board
void setup() {
  // initialize digital pin LED_BUILTIN as an output.
  pinMode(LED_BUILTIN, OUTPUT);
}

// the loop function runs over and over again forever
void loop() {
  digitalWrite(LED_BUILTIN, HIGH);   // turn the LED on (HIGH is the voltage level)
  delay(1000);                       // wait for a second
  digitalWrite(LED_BUILTIN, LOW);    // turn the LED off by making the voltage LOW
  delay(1000);                       // wait for a second
}