
This tutorial will show how to open a new project from stm32 CubeMX software for ARM Keil uvision IDE. stm32CubeMX is a graphical tool used to configure the STM32 microcontroller. Keil uvision ide is used to develop software for ARM Cortex-MX based microcontrollers.
Our other STM32 Microcontroller related tutorials are:
- Understanding STM32 HAL Library Fundamentals
- STM32 ADC Interfacing with HAL code example
- Getting Started with FreeRTOS in STM32
- Stm32 I2C communication with HAL code example
- STM32 UART / USART tutorial with HAL code example
Component List for the Project
| Component Name | Quantity | Purchase Link |
|---|---|---|
| STM32 Nucleo Dev. Board | 1 | Amazon |
| Breadboard | 1 | Amazon |
| Jumper Wire Pack | 1 | Amazon |
Affiliate Disclosure: When you click on links to make a purchase, this can result in this website earning a commission. Affiliate programs and affiliations include, but are not limited to Amazon.com
Download Links:
There are a few steps that need to follow to create a new project in stm32CubeMX for Keil ide:
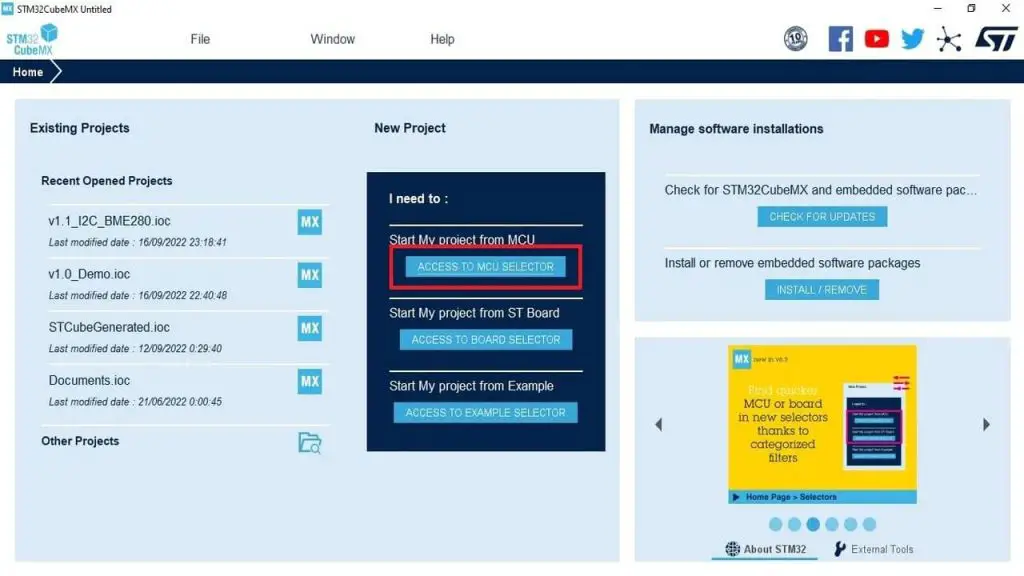
Step 1: Create a new project on stm32CubeMX
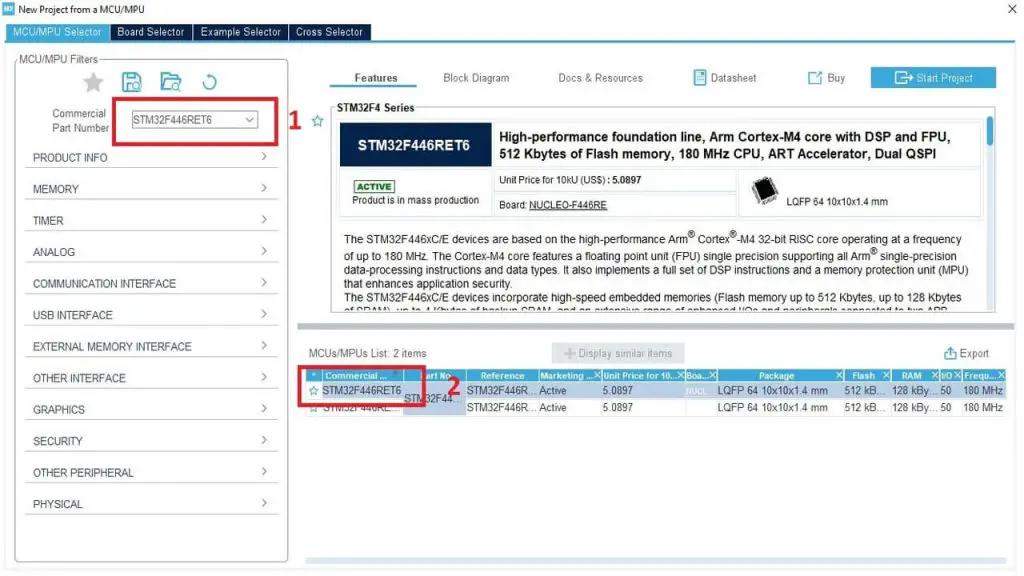
Step 2: Search your desired MCU and Select it from CubeMX. In this project, I select a stm32f446re microcontroller for demonstration purposes
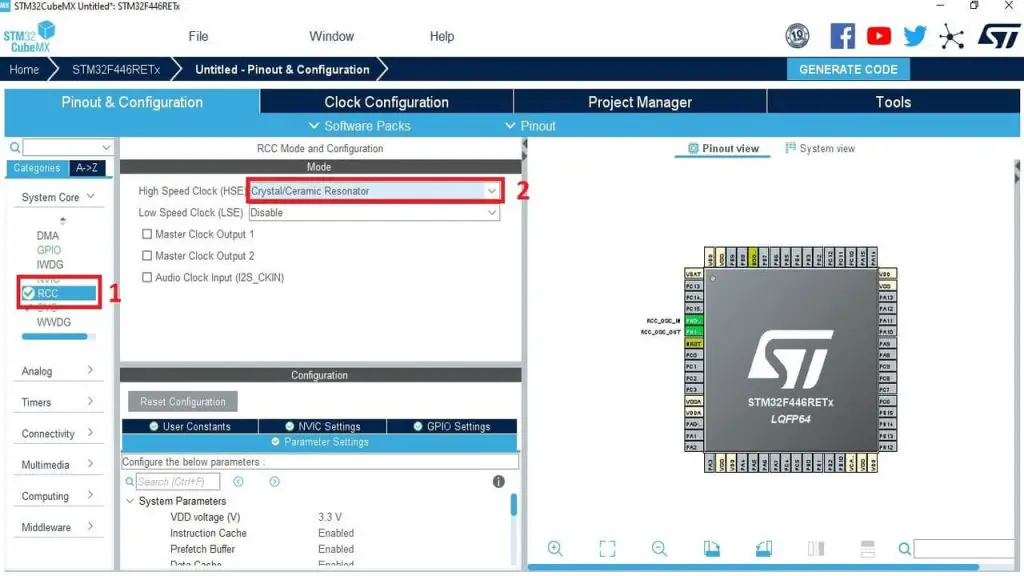
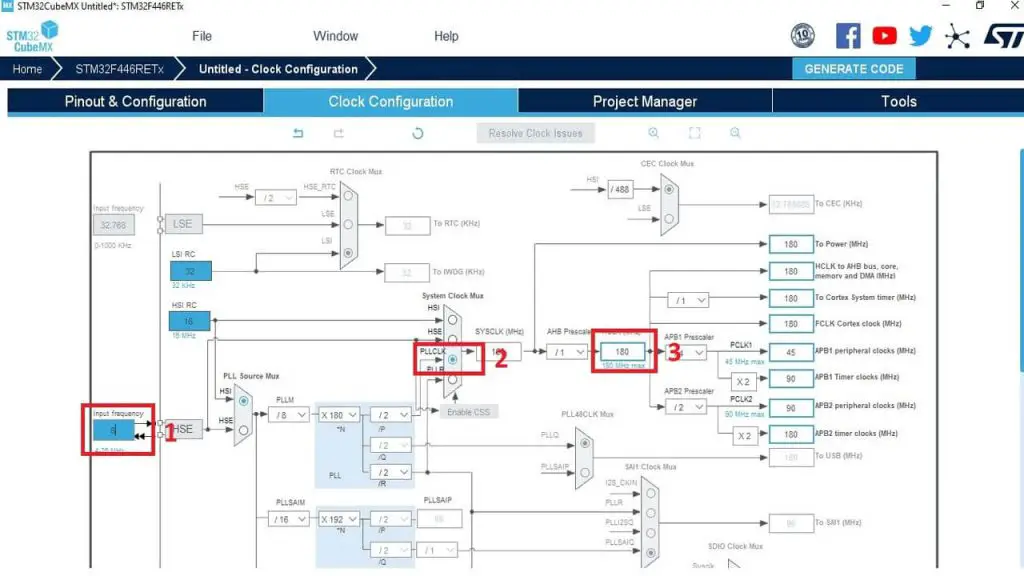
Step 3: Go to System Core > RCC and select clock source from High-Speed Clock (HSE) option. I am using an 8 MHz external crystal oscillator. So, I have selected the Crystal/Ceramic Resonator option
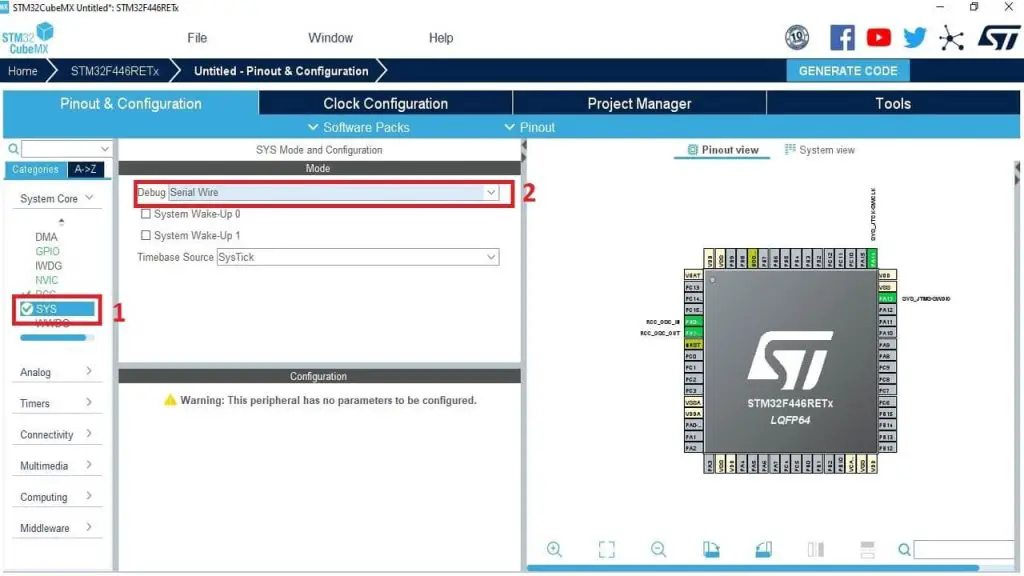
Step 4: Go to System Core > Sys and select Serial Wire
Step 5: Go to the Clock Configuration tab and select your desired clock source and speed. I have used PLL (Phase-locked loop) with an 8 MHz external oscillator and derived a 180 MHz clock speed
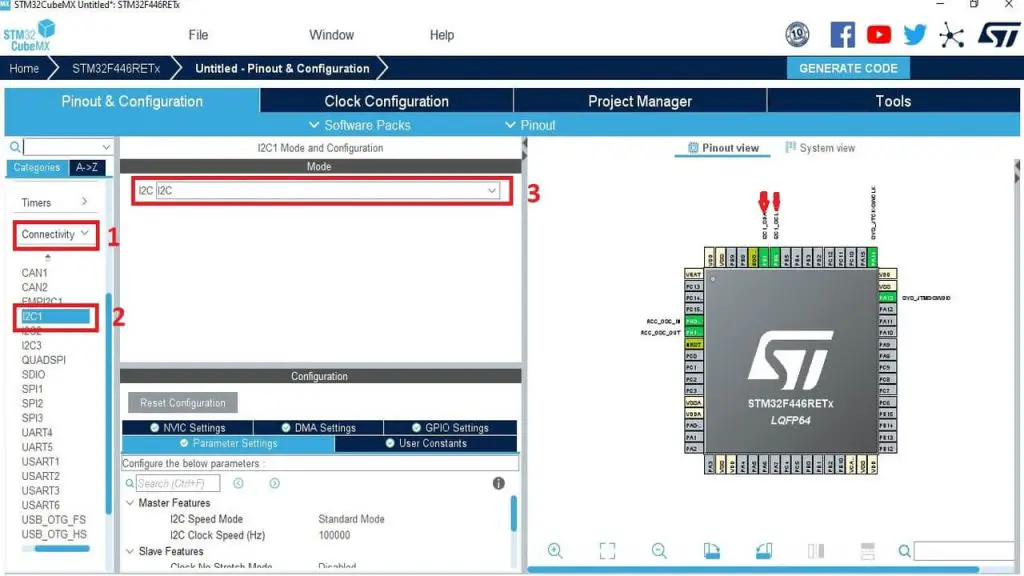
Step 6: Configure your desired peripherals like I2C, SPI, UART, or ADC. I configure the I2C peripheral.
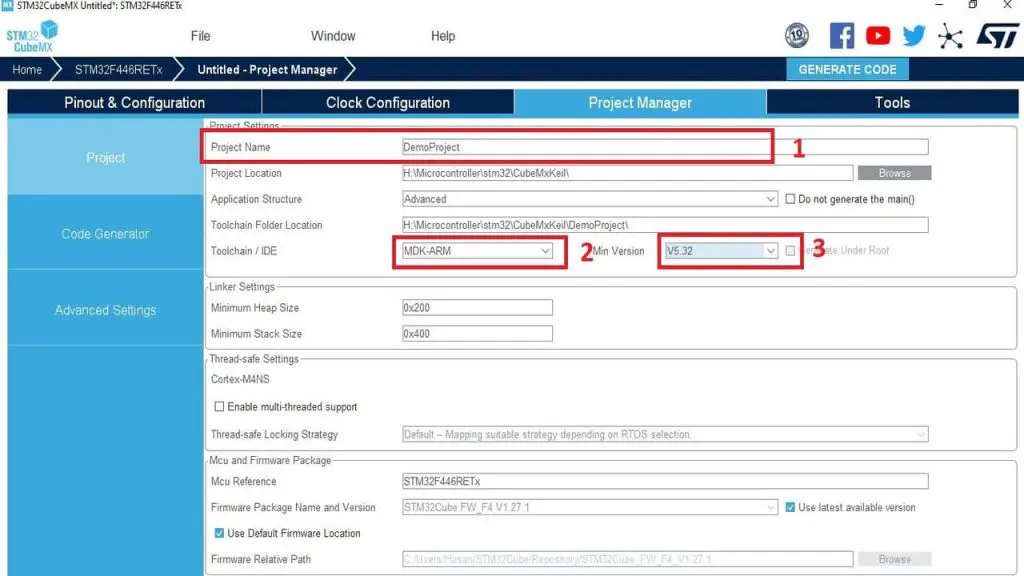
Step 7: Now go to the Project Manager tab and write your project name, then change the toolchain/ide to MDK-ARM and also select the latest version.
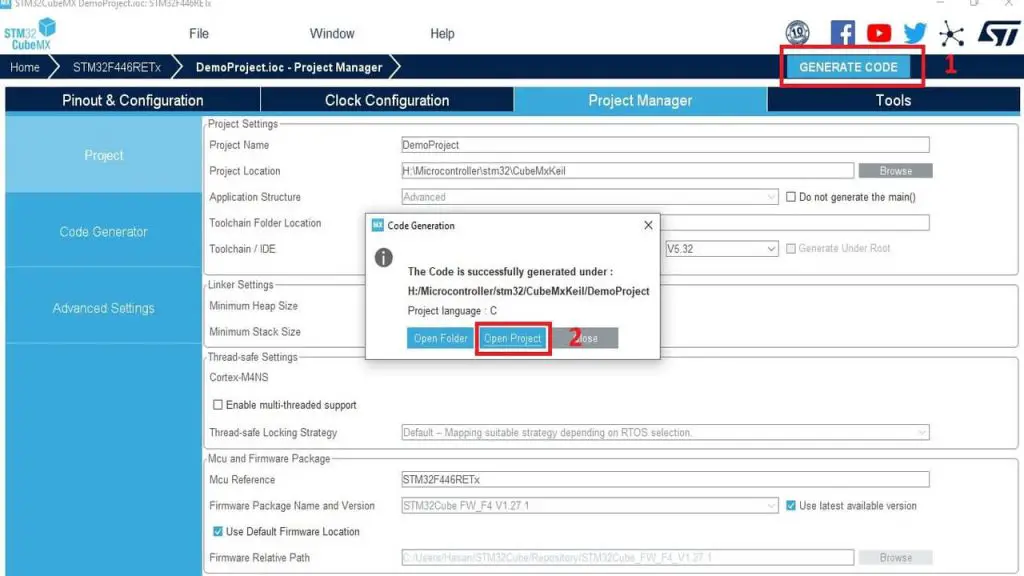
Step 8: Click to Generate Code tab and open the project in keil uvision ide.
Step 9: Try to build the project in Keil ide. You may have seen the project is not made and show some warning in the Build Output tab.
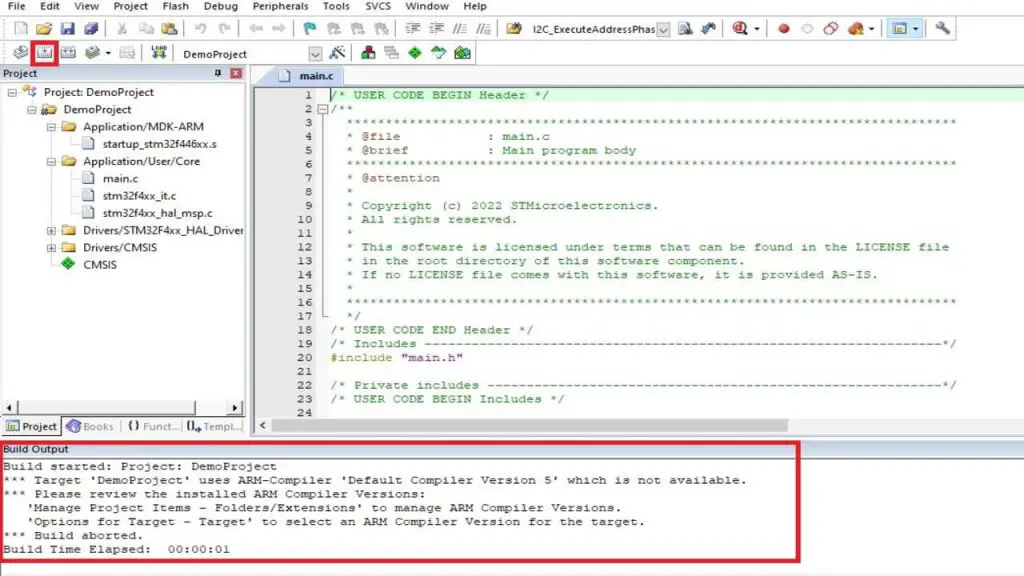
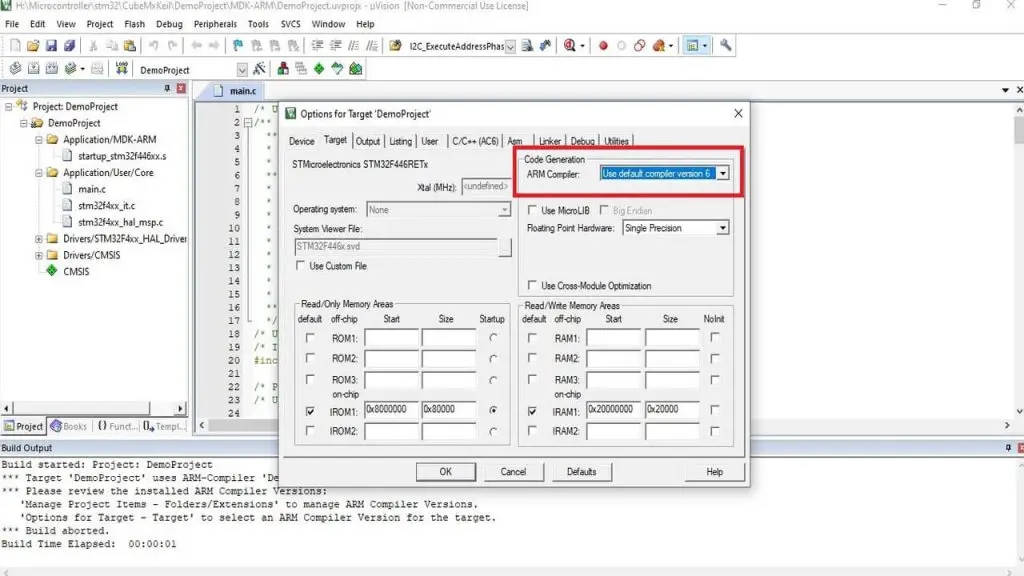
Step 10: For solving this issue go to Project > Options for target “Project Name” and select the latest ARM Compiler
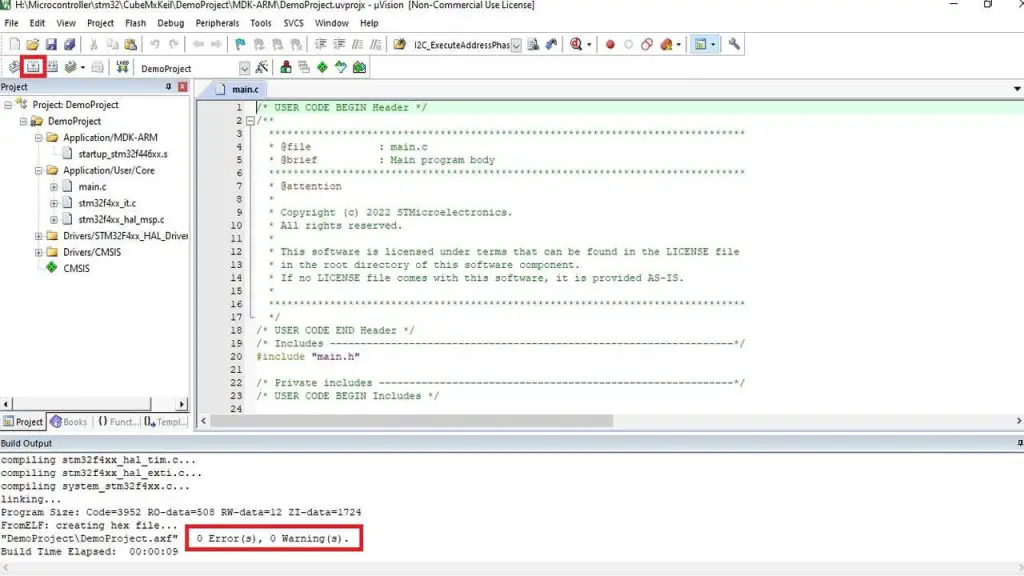
Step 11: After that just build the project again and Run it to your STM32 Microcontroller
This is all for this tutorial.